- KHUYẾN MÃI (22)
- Raspberry Pi 5 (22)
- SẢN PHẨM MỚI NHẤT (35)
- ASUS Tinker (51)
- Chơi âm thanh (6)
- Màn hình (51)
- Raspberry Pi 4 Model B (95)
- AI Computer and System on Module (55)
-
NVIDIA Jetson Nano Developer Kit (123)
- Module 4G/3G/2G/GNSS dành cho NVIDIA Jetson Nano (7)
- Màn hình LCD cho Jetson Nano (16)
- Robot dành cho Jetson Nano (2)
- Jetson AI Boards (27)
- Camera cho Jetson Nano (32)
- Nguồn cho Jetson Nano (14)
- Vỏ hộp và quạt tản nhiệt cho Jetson Nano (8)
- Module cho Jetson Nano (10)
- Phụ kiện khác cho Jetson Nano (17)
- LattePanda (38)
- BeagleBone (6)
- Raspberry Pi B+/Raspberry Pi2/Raspberry Pi3 (262)
- Raspberry Pi Zero (24)
- Module Boards (208)
- Modules cảm biến (113)
- Mạch Arduino (66)
- Mô hình Robot (20)
- Robot dành cho Raspberry Pi (8)
Industrial Grade Metal Case (D) dành cho Raspberry Pi 5
![]()
Hỗ trợ mua hàng : 02436.231.170 or 0984.058.846
Tư vấn kỹ thuật Raspberry Pi và RS232/RS485 to Ethernet : 0862.628.846
Tư vấn kỹ thuật Module khác : 0866.828.846 or 0862.998.846
VUI LÒNG LIÊN HỆ ĐỂ ĐƯỢC HỖ TRỢ KỸ THUẬT VÀ ĐẶT HÀNG TRỰC TIẾP
GIẤY XÁC NHẬN MLAB LÀ ĐƠN VỊ PHÂN PHỐI CHÍNH THỨC (OFFICAL DISTRIBUTOR) CỦA WAVESHARE TẠI VIỆT NAM
Industrial Grade Metal Case (D) for Raspberry Pi 5, Larger Internal Space, Supports Installing Official Cooling Fan And Various HATs, Wall-mount and Rail-mount Support
Industrial Metal Case for Raspberry Pi 5
Rail-mount and Wall-mount Support, Larger Internal Space, Supports installing various HATs and Expansion Boards
Từ 2022 MLAB có thêm website mlab.com.vn với nền tảng web mới hơn, dễ sử dụng hơn cho quý khách hàng tra cứu, đặt hàng online tại MLAB. Quý khách hàng có thể mua Industrial Grade Metal Case for Raspberry Pi 5 tại MLAB tại link: (link đặt hàng)
* for reference only, the Raspberry Pi 5 is NOT included.
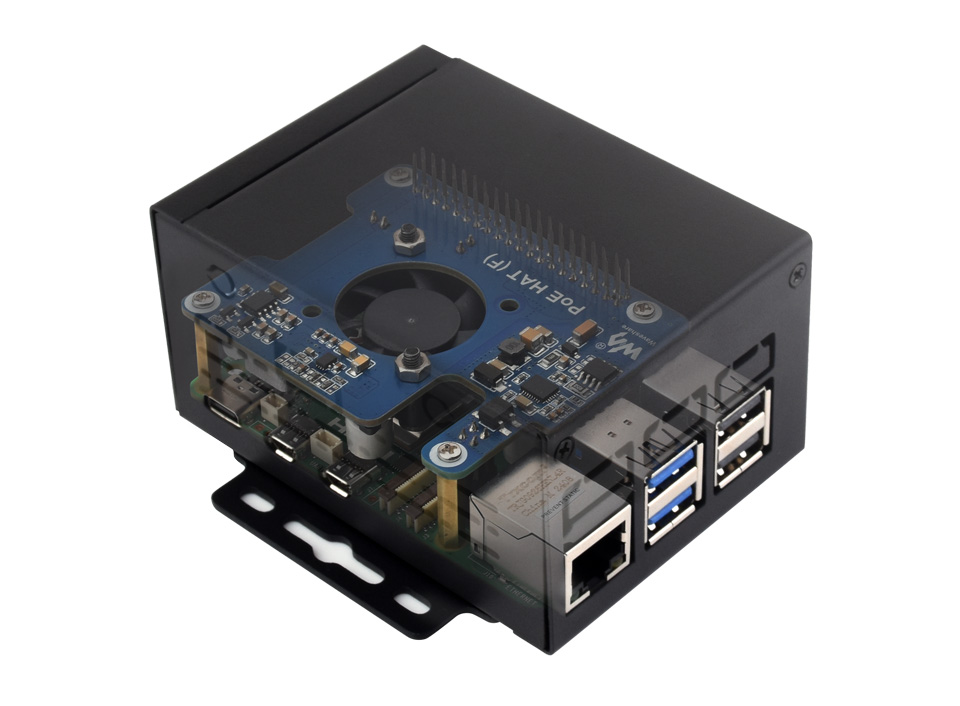
Larger Internal Space
Metal case with simple appearance design, Compatible with Most HATs/Modules and Accessories of Raspberry Pi 5
Precise Cut-Out Design
Each Cut-Out Is Completely Aligned With The Interfaces of Raspberry Pi 5, with removable reserved holes. It also has reserved antenna holes and RF outlets to reduce signal attenuation of WiFi and Bluetooth communication
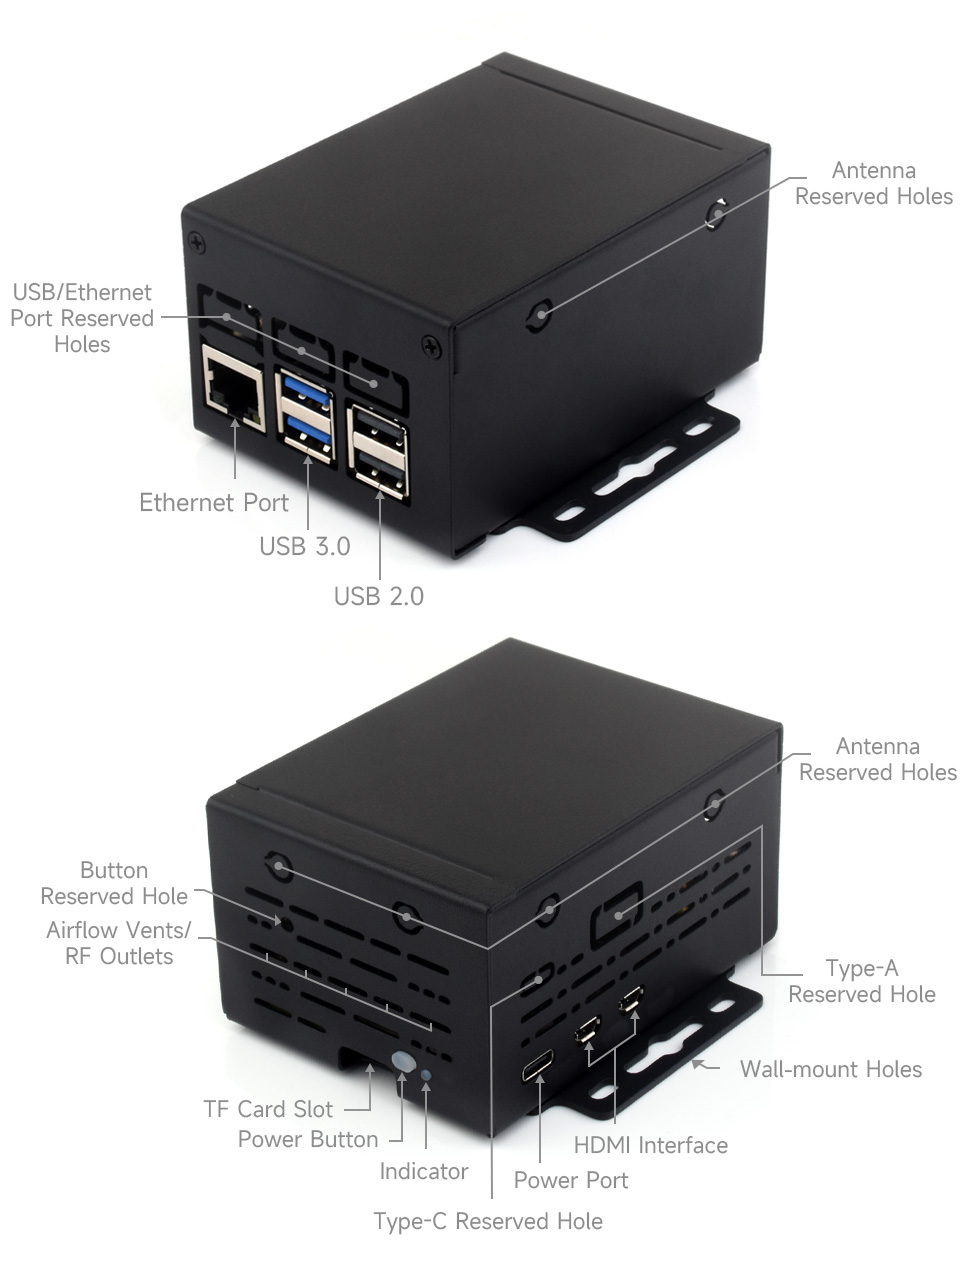
Note: The reserved holes are designed with removable panels. Users can cut them open with needle-nose pliers according to the interface requirements of internal HAT or expansion board.
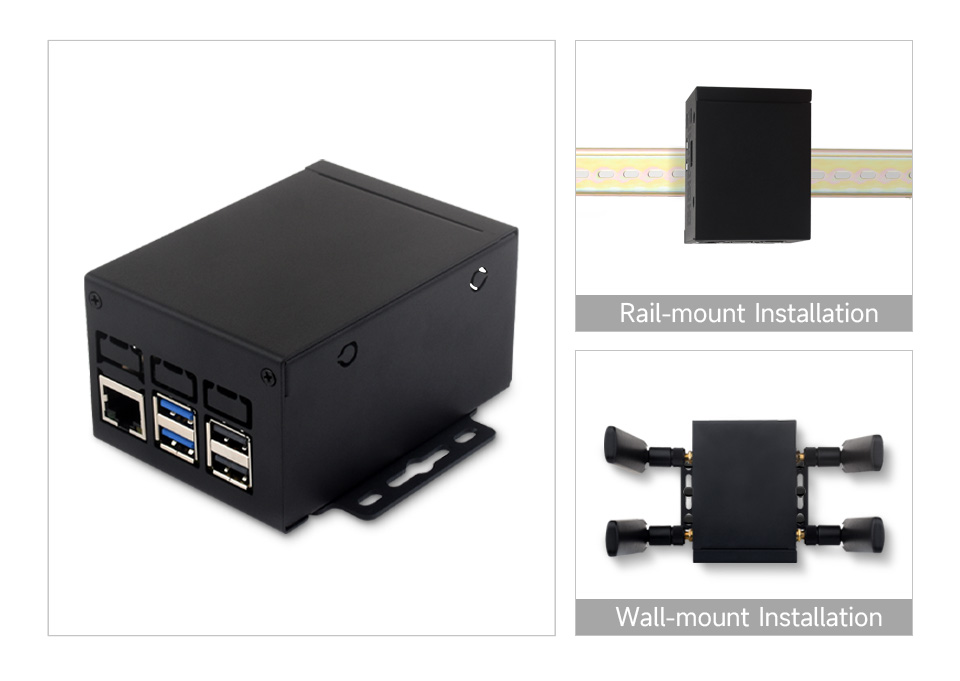
Wall Mount & Rail-mount Support
More flexible for industrial installation and use
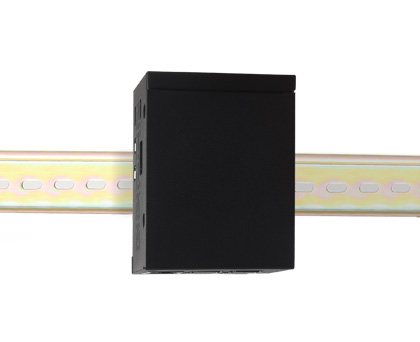
Comes with rail-mount bracket, supports 35mm standard guide rail
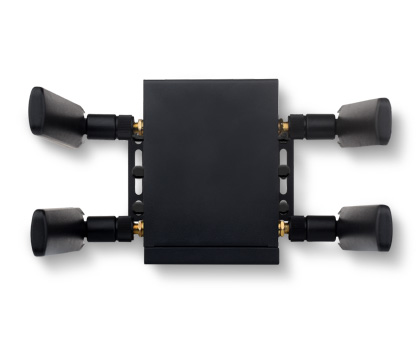
Wall-mount installation
Supports installing various HATs
Installing with PCIe TO 4G/5G M.2 USB3.2 HAT+
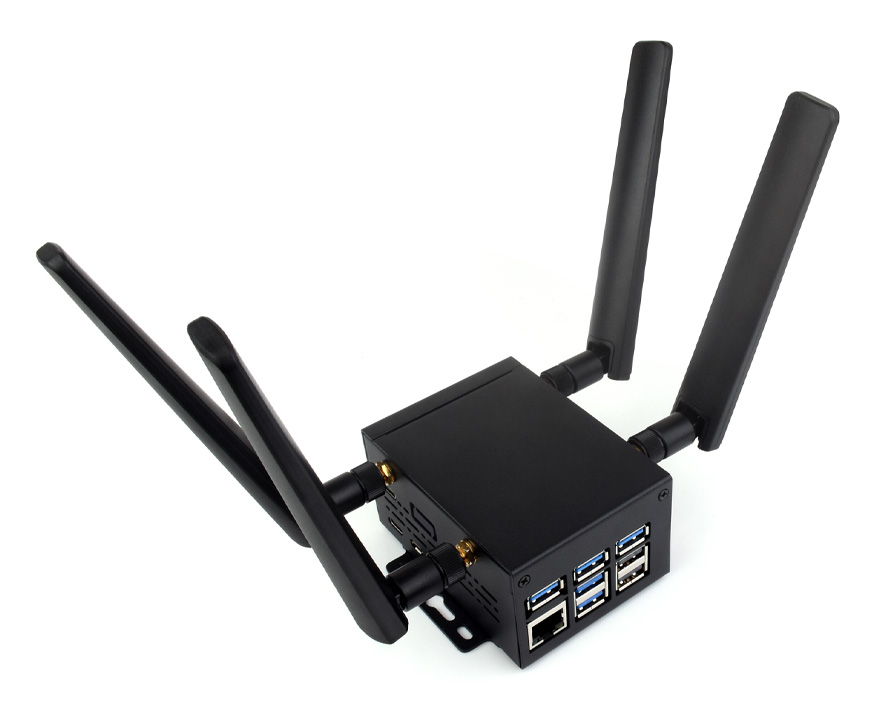
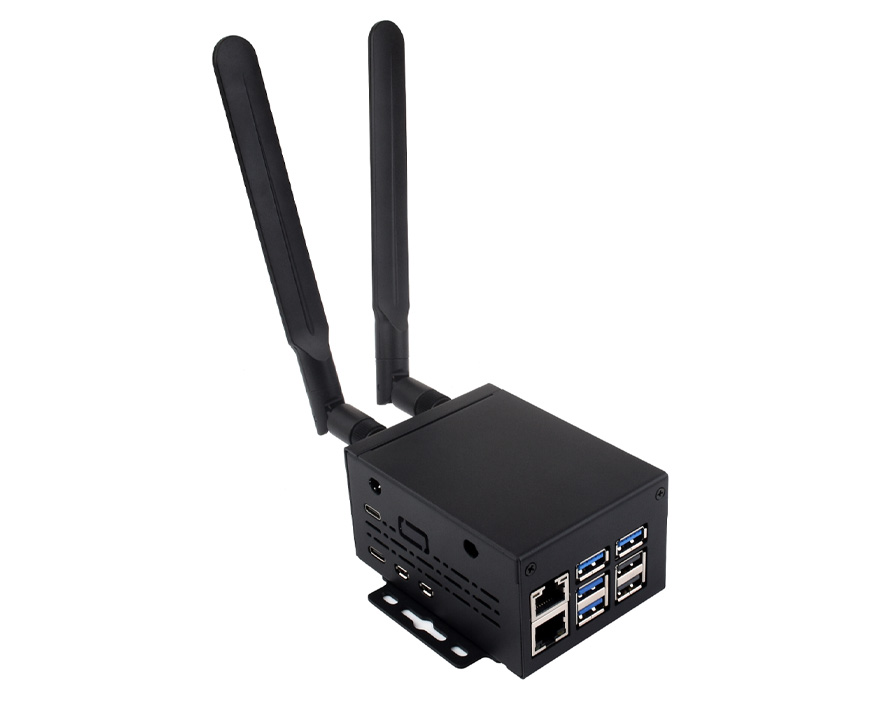
Installing with PCIe TO Gigabit ETH USB3.2 HAT+
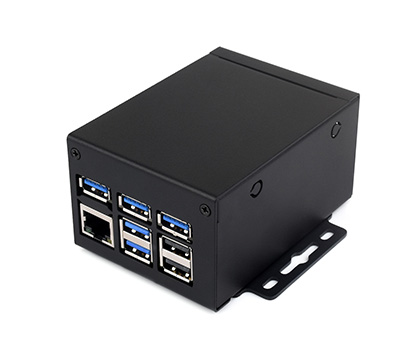
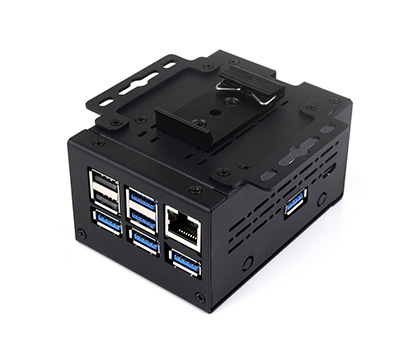
* for reference only, the Raspberry Pi, external antennas and PCIe HATs are NOT included.
Pi5 Assembly instruction
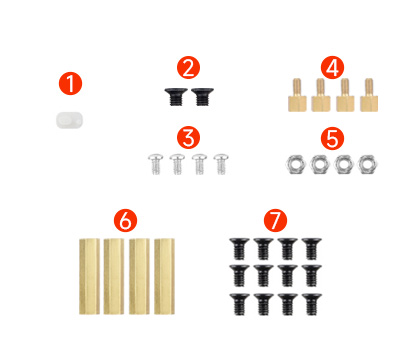
Prepare the screws as shown above. The following is an assembly demonstration using Raspberry Pi 5 and the official cooling fan.
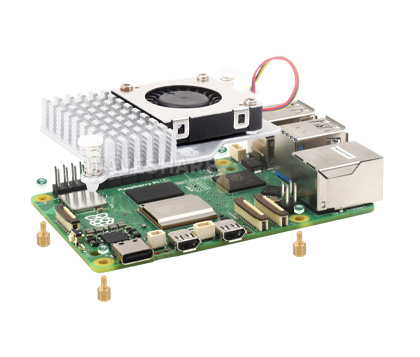
1. Install the cooling fan to the Raspberry Pi 5 with 4x ④ copper standoff and 4x ⑤ nut (or ⑥ copper standoff).
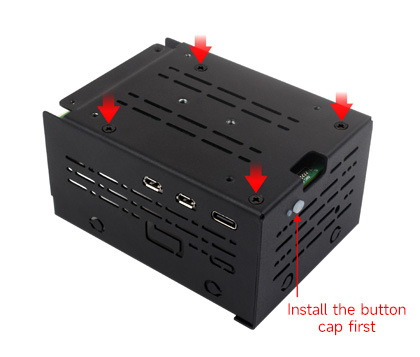
2. Install the ① button cap to the hole on the bottom case, align the interface holes to install the Raspberry Pi 5, and fix the Pi via 4x ⑦ screw.
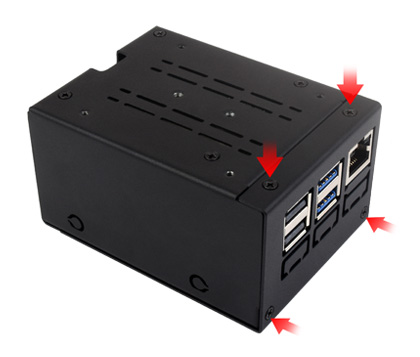
3. Align the top cover to the USB/ETH ports of Pi 5 and snap it into the bottom case, and assemble them together with 4x ⑦ screw.
4. Then install wall-mount or guide rail bracket according to your needs.
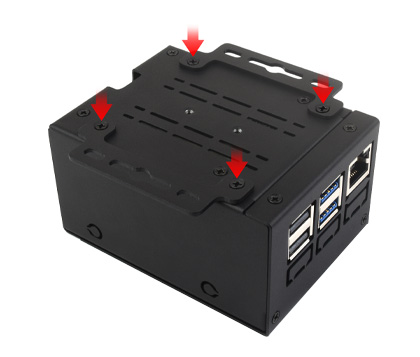
Wall mounting: use 4x ⑦ screw to install the wall-mount bracket to the position shown in the picture.
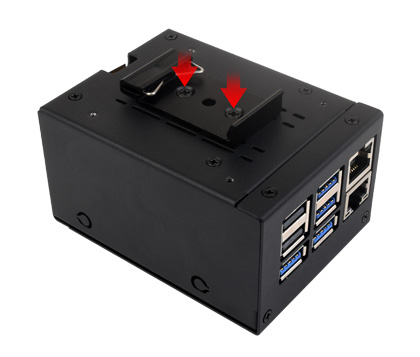
Rail mounting: use 2x ② screw to install the rail-mount bracket to the position shown in the picture.
Assembly instruction of Pi5 + HAT

Prepare the screws as shown above. The following is an assembly demonstration using Raspberry Pi 5 and the PCIe to M.2 NVMe SSD (LINK HERE) or PCIe to 2-CH M.2 HAT Dual NVMe SSD (LINK HERE)
With PCIe to M.2 NVMe SSD
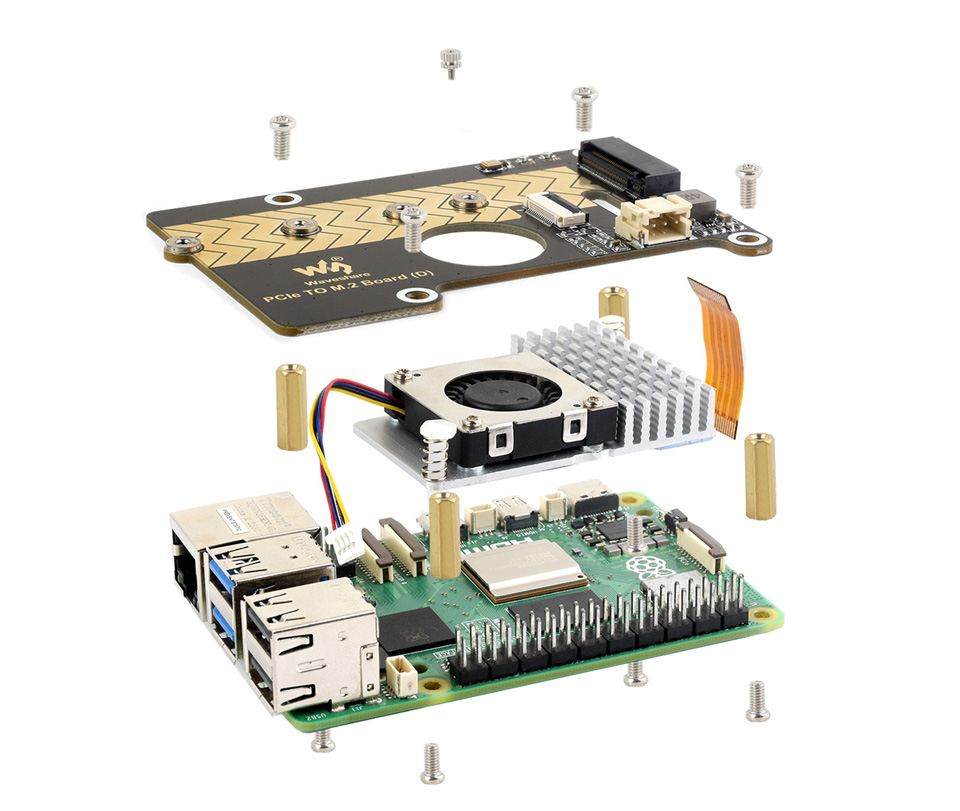

With PCIe to 2-CH M.2 HAT Dual NVMe SSD
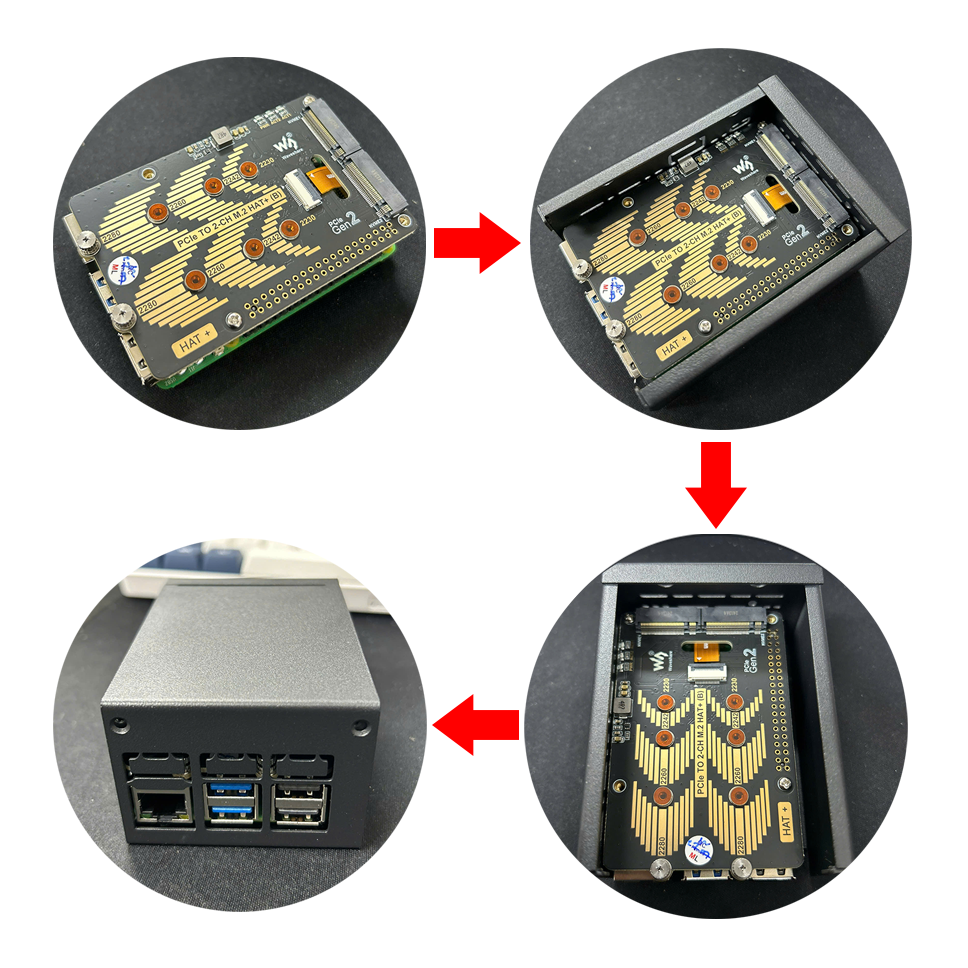
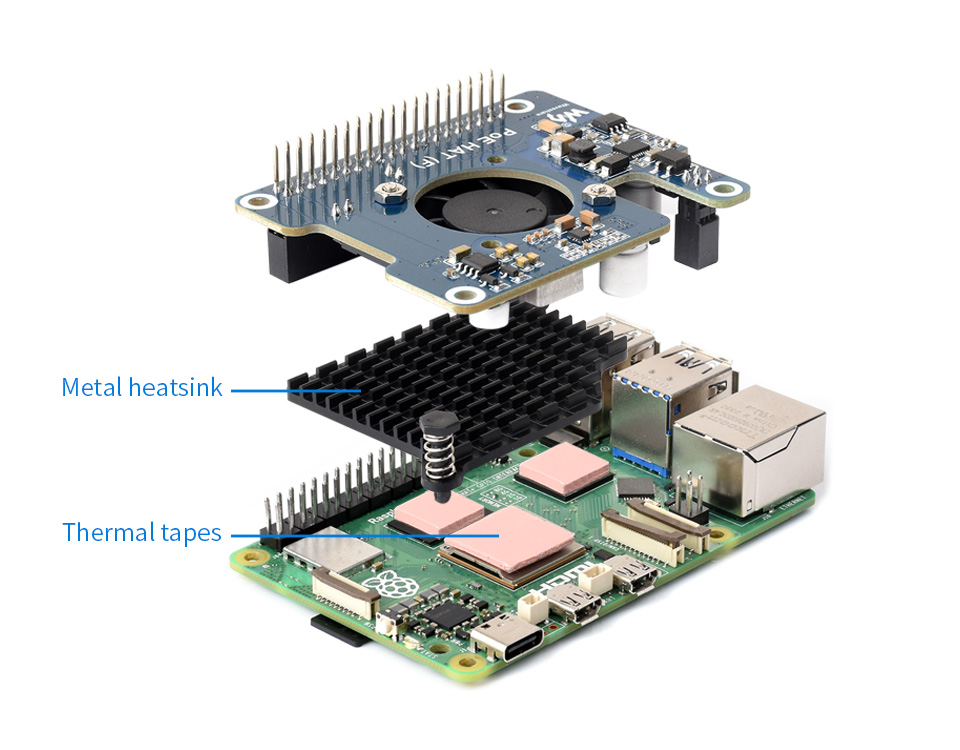
With PCIe to M.2 NVMe SSD + PoE HAT (F) (LINK HERE)
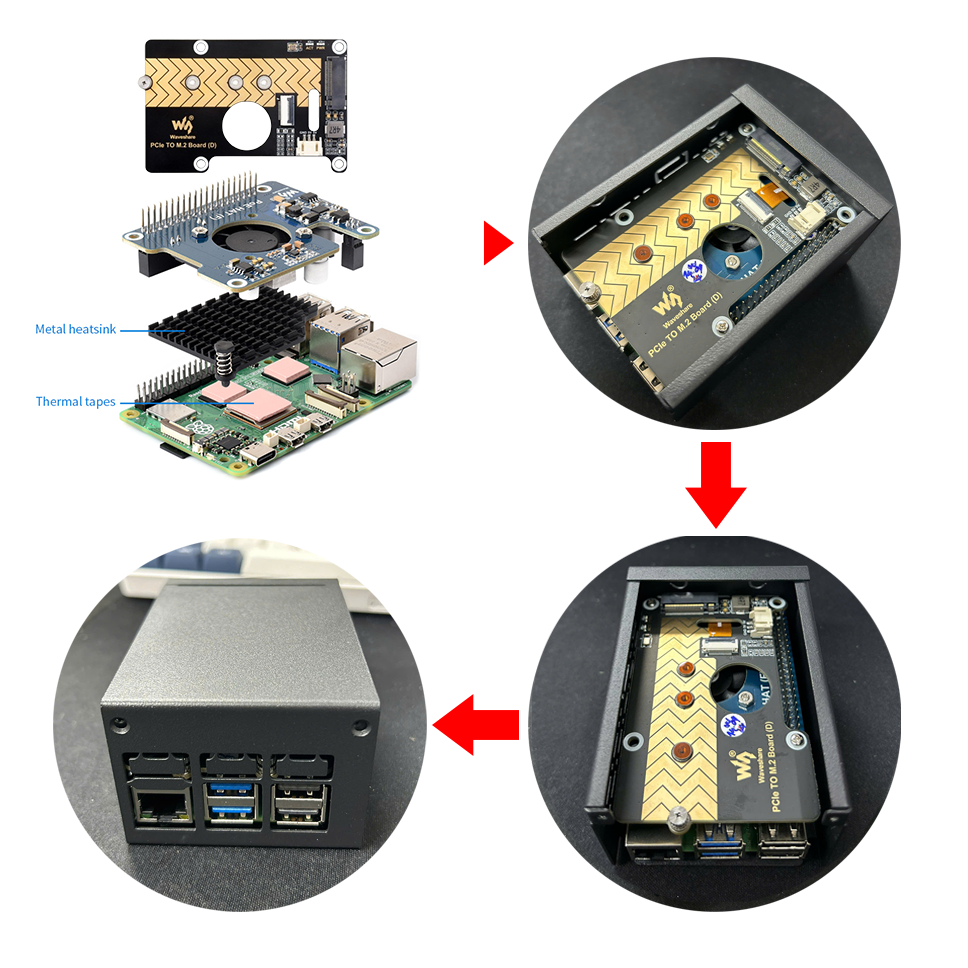 Outline dimensions
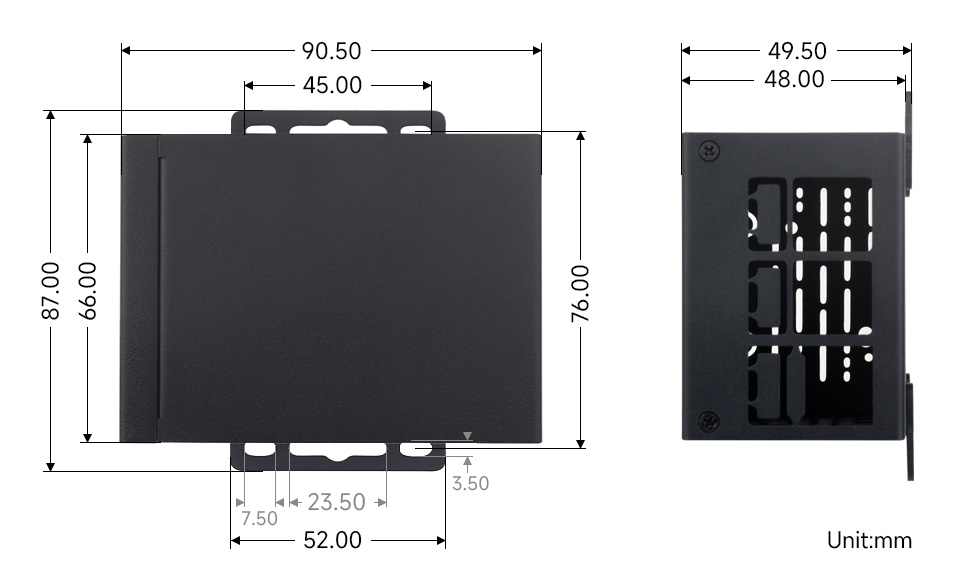
Viết đánh giá
Họ và tên:Đánh giá của bạn: Lưu ý: Không hỗ trợ HTML!
Bình chọn: Xấu Tốt
Nhập mã bảo vệ:


